Reverse Proxy

Having run a reverse proxy on my pi for a couple of months, I though it about time to write an article on how I did it.

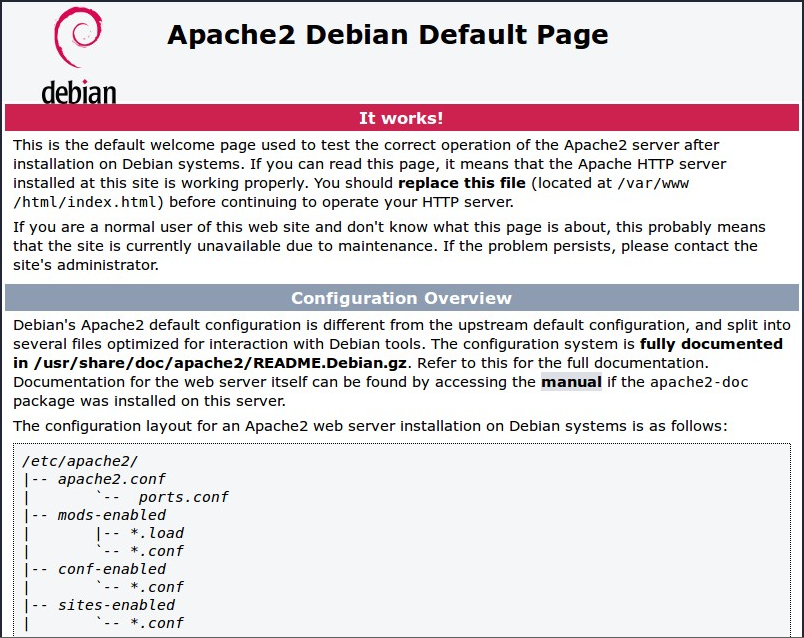
First make sure your website is running on your private server. Running a basic apache2 test page will be enough to get you up and running.

Having installed nginx, either by compiling it from source code or installing it from apt, you need to create the configuration file, with the name to help you identify the config:

sudo nano /etc/nginx/sites-available/example.uk.conf

Inside the config file you need to setup the parameters, changing details for your setup.

# Main URL
server {
	listen 80;
	server_name example.uk;
	location / {
		proxy_pass http://IP_ADDRESS/;
	}
}

Save and exit the file.

Create a symbolic link to enable the new config file:

sudo ln -s /etc/nginx/sites-available/example.uk.conf /etc/nginx/sites-enabled/example.uk.conf

Test your nginx configuration:

sudo nginx -t

Reload nginx:

sudo systemctl reload nginx

Ensure that you have port forwarded port 80 on your router to your reverse proxy, and provided you have dynamic dns setup on your domain name you should be able to visit example.uk and see your site.

You can now configure your site to use HTTPS. You will need to install the free certbot client:

sudo apt-get install certbot -y

certbot needs port 80 to get the certificates, so you will need to stop your nginx service temperarily

sudo service nginx stop

Because port 80 is already forwarded to your reverse proxy, everything is in place to get your certificate. Replace example.uk with your domain name.

certbot certonly --standalone -d example.uk -d www.example.uk

After running these commands, you will be prompted to enter some details, such as your email address. These details are required for Let’s Encrypt to keep track of the certificates it provides and also allow them to contact you if any issues arrive with the certificate.

Once you have filled out the required information, it will proceed to grab the certificate from Let’s Encrypt. If you get any errors, make sure you have directed your domain to your IP address, make sure port 80 and port 443 are unblocked and forwarded, and make sure nginx and apache are not running.

The certificates that are retrieved the certbot client will be stored in the following directory. Each domain name has its own directory

/etc/letsencrypt/live/

You can now add the SSL certificate to your reverse proxy configuration. Navigate to your config folder, and open your config file you created earlier

cd /etc/nginx/sites-available

sudo nano example.uk.conf

Under your server {} block, create a new server block. You can copy the original block if your prefer. Update the listening port to port 443 and include the ssl_certificate and ssl_certificate_key instructions to link the SSL certificate.

server {
	listen 443 ssl;
	server_name example.uk;

	ssl_certificate /etc/letsencrypt/live/example.uk/fullchain.pem;
	ssl_certificate_key /etc/letsencrypt/live/example.uk/privkey.pem;

	location / {
		proxy_pass http://IP_ADDRESS/;
	}
}

Now edit the original server{} block to force your site traffic to use your SSL site rather than the original site. This creates a perminant 301 redirect to the https url.

server {
	listen 80;
	server_name example.uk;

	return 301 https://$host$request_uri;
}

In order to get wordpress working on my raspberry pi behind the reverse proxy, I have also had to include these lines in the 443 location block:

proxy_set_header X-Forwarded-Proto https;
proxy_buffering on;
proxy_buffers 12 12k;
proxy_redirect off;
proxy_set_header X-Real-IP $remote_addr;
proxy_set_header X-Forwarded-For $remote_addr;
proxy_set_header Host $host;
client_max_body_size 20M;

So my whole config file now looks like this:

# Main URL
server {
	listen 80;
	server_name example.uk;

	return 301 https://$host$request_uri;
}
server {
	listen 443 ssl;
	server_name example.uk;

	ssl_certificate /etc/letsencrypt/live/example.uk/fullchain.pem;
	ssl_certificate_key /etc/letsencrypt/live/example.uk/privkey.pem;

	location / {
		proxy_pass http://IP_ADDRESS/;
		proxy_set_header X-Forwarded-Proto https;
		proxy_buffering on;
		proxy_buffers 12 12k;
		proxy_redirect off;
		proxy_set_header X-Real-IP $remote_addr;
		proxy_set_header X-Forwarded-For $remote_addr;
		proxy_set_header Host $host;

 		client_max_body_size 20M;
	}
}

Install WordPress on Raspberry Pi

Having setup a Raspberry Pi as a webserver, you may want to run WordPress on it.

SSH to your Pi and change into the web root folder:

cd /var/www/html

remove all the files currently there

sudo rm *

Download the latest WordPress package

sudo wget http://wordpress.org/latest.tar.gz

Extract the Tarball to get to the wordpress files.

sudo tar xzf latest.tar.gz

Move the extracted files into the current directory and remove the tarball file.

sudo mv wordpress/* .

sudo rm -rf wordpress latest.tar.gz

Raspberry Pi Webserver

Yes, there are tens, if not more, of tutorials on how to setup a raspberry pi as a web server. The raspberry pi foundation even have a detailed tutorial. However, I have found that I tend to look at several websites when settings up my webservers, so I wanted to refine everything into one place.

First start off with a fresh install of raspbian – I always use lite on web servers as I don’t need all the extra software.

Run the normal update and config with

sudo apt update
sudo apt upgrade 
sudo raspi-config

and set a static IP address by editing /etc/dhcpcd.conf and inputting the following with the appropriate settings for your setup

interface eth0
       static ip_address=xxx.xxx.xxx.xxx/24
       static routers=xxx.xxx.xxx.xxx
       static domain_name_servers=xxx.xxx.xxx.xxx
interface wlan0
       static ip_address=xxx.xxx.xxx.xxx/24
       static routers=xxx.xxx.xxx.xxx
       static domain_name_servers=xxx.xxx.xxx.xxx

Apache2

Once updated, and assigned an IP you can setup the web server

sudo apt install apache2 -y

Once installed, browse to the IP address of the pi and you should see the Debain default web page.

If you want to change the port that the web server is working on edit the ports.conf file in /etc/apache2, and the 000-default.conf file in sites-available,

PHP

To install php run the following command

sudo apt install php libapache2-mod-php -y

You can check the install worded by creating a phpinfo page

sudo nano /var/www/html/phpinfo.php

with the following code

<?php phoinfo(); ?>

Congratulations, you now have a basic web server up and running on your pi.

If you intend on using a database with PHP you need to install the connector:

sudo apt install php-mysql

Database

Many websites are dynamic websites, and run on a database. Some sites run MySQL, but many sites are now using MariaDB. Install mariaDB with the following command:

sudo apt-get install mariadb-server

MariaDB will configure itself during installation. You then need to secure the install with the following:

sudo mysql_secure_installation

Set a password and answer ‘y’ for all the questions.

You can now log into the mysql database

sudo mysql -u root -p

You need to create a database, and a user to interact with that database. Use ‘CREATE DATABASE’ and the database name e.g. website

CREATE DATABASE website;

Next create a user by running the following command, change the ‘user’ and the ‘password’ to suit your needs.

CREATE USER 'user'@'localhost' IDENTIFIED BY 'password';

The give the new user access to the database you created earlier

GRANT ALL PRIVILEGES ON website.* TO 'user'@'localhost';

Finally to allow the new user access to the database, you need to flush the priviledges. Do this with the following command

FLUSH PRIVILEGES;

PHPMyAdmin

Install PHPMyAdmin on the pi with this command:

sudo apt install phpmyadmin

PHPMyAdmin will then install on your pi. There are various configuration steps needed to setup PHPMyAdmin. When prompted which type of webserver you want to run PHPMyAdmin on choose ‘apache2’.

Now you need to configure PHPMyAdmin for your MySQL server.

You will need to specify a password for PHPMyAdmin to interact with your MySQL database – choose a strong password, and one that is different to the root password you set earlier.

PHPMyAdmin will by default block access to the MySQL database. If you didn’t create a user earlier, do so now.

To access PHPMyAdmin through your wesbite, you need to edit the ‘Apache2.conf’ file and add the PHPMyAdmin config to the bottom of the file:

Include /etc/phpmyadmin/apache.conf

Now restart Apache2.

sudo service apache2 restart

Your webserver is now up and running. You can see how I installed WordPress in the next post.

Raspbian Downloads

The release of the Raspberry Pi 4B has meant the release of the new version of Raspbian – Buster. Then my Pi-Hole went wrong – it crashed. Unrecoverable. I downloaded Buster and installed Pi-Hole – it seemed to work, but the web interface wouldn’t load, and the DHCP server didn’t work. Checking the Pi-Hole support pages showed Buster wasn’t supported. I had to get hold of a version of Stretch. But where? No where on the RPi website could I find an archive of previous releases. Then I found them lurking on the internet – hidden from view – but they were there.

And here are the links:

Rasbian Desktop with Recommended Software Archive: https://downloads.raspberrypi.org/raspbian_full/images/

Raspbian Desktop Archive: https://downloads.raspberrypi.org/raspbian/images/

Raspbian Lite Archive: http://downloads.raspberrypi.org/raspbian_lite/images/

Raspberry Pi Update fails

Recently I was trying to update Raspbian when my SSH connection failed.  This meant that the update did not complete successfully.  To prevent issues like this in the future I found an app called ‘screen’.  More on this to follow.

The failed update meant that I couldn’t complete any further updates.  When trying to run:

sudo apt-get upgrade

I would get the error:

dpkg was interrupted, you must manually run 'sudo dpkg --configure -a' to correct the problem.

Running sudo dpkg –configure -a did not correct the problem and caused the SSH connection to time out.  The solution was to flush dpkg with the command below:
cd /var/lib/dpkg/updates
sudo rm *

This removed all ‘bad’ items.  Running the apt-get update and apt-get upgrade commands then worked.

Mounting a Windows Network Drive

Non-Persistant Connection

I have often found it necessary to access files on my raspberry pi that are hosted on either my windows computer, or on an Windows File Server on my Active Directory Network.

In order to mount a network drive you need to have a folder on the RPi ready.  This can be anywhere, depending on your needs.  If you are going to mount the share permanently, I recommend creating a directory in the /mnt directory. Alternatively, if it is only a quick file access you can create a new directory in the /home/pi folder.

Either way, change directory into the parent directory you are creating a folder in

cd /mnt

or

cd /home/pi

you can now create your new directory

sudo mkdir directory-name

change directory-name to be something of your choosing that corresponds to what you are mounting.

To mount your folder type the following into your terminal

sudo mount -t cifs -o username=yourusername,password=yourpassword //server/share /path/to/directory-name

If you Have got spaces in your //server/share path, enclose the path with double quotes e.g. “//server/share path”.  Remember to replace yourusername and yourpassword with the correct values to allow you to log in to your network share.

To check if you have correctly mounted your network share run the following command

df -h

You will see a list of all your mounted volumes, one of which should be the one you mounted above.  Alternatively (or as well) navigate to the share path and list the contents of the folder e.g.

cd /mnt/directory-name

ls

If there are any files on your share, you will now be able to see them.

Persistent Connection

The initial steps are the same as for a non-persistent connection, however rather than mounting the share via the terminal, we need to mount it via fstab. Edit the fstab

sudo nano /etc/fstab

Append the following lines to the end of fstab.

//server/share /path/to/directory-name cifs username=yourusername,password=yourpassword 0 0

Save the file, and run

more /etc/fstab

Your mount should be listed in information on screen. Reboot your RPi and run

df -h

You should still see your mount, and be able to access your directory.

Unmount a share

Run the following command in the terminal

sudo umount //server/share

Headless Setup

Once you have downloaded the OS img file from the foundation website, it will probabably be useful to add a couple of features to get your going straight away.

Inside the boot partition create a file called wpa_supplicant.conf.  Inside that file add the following

ctrl_interface=DIR=/var/run/wpa_supplicant GROUP=netdev
update_config=1
country=«ISO-two-letter-country-code»

network={
    ssid="«your_SSID»"
    psk="«your_PSK»"
    key_mgmt=WPA-PSK
}

Replace «ISO-two-letter-country-code» with your ISO Country Code (such as GBfor Great Britain), «your_SSID» with your wireless access point name and «your_PSK» with your wifi password.

Then in the same folder create a file called SSH to enable you to SSH to your pi.

Forgotten Raspberry Pi Password

I forgot the password for my Pi. This is the technique I found for resetting the pi user password.

Step 1 – Remove the SD Card

Remove the SD card from the Pi and insert it into your PC.

Step 2 – Edit cmdline.txt

In the boot partition there is a file named “cmdline.txt”. Edit this file in a text editor and add the following to the end of the existing text:

init=/bin/sh

Make sure it is all one line!

Save the text file and eject the SD card from the PC.

Step 3 – Reset the Pi Password

Insert the card into the Pi with a monitor and keyboard connected. Power up the Pi. There may be a delay but you should be presented with a cursor.

At the prompt type the following command :

mount -o remount, rw /

You may see an error message.  Just enter the above command again.

/bin/sh: 0: can’t access tty; job control turned off [ 21.366191] random: crng init done

Enter the command to change the pi password

passwd pi

You will then be prompted for a new password. Enter it carefully and press the [Return] key. It will now ask you to retype the password.

Reset Lost Password

The password has been changed.

Now type the following commands :

sync
exec /sbin/init

The Pi will continue to boot and return you to the normal command line prompt.

Log in to the pi with the new credentials

Shutdown the Pi and power it off.

sudo halt

Step 4 – Edit cmdline.txt

Remove the SD card from the Pi and using the PC edit the “cmdline.txt” file again and remove the “init=/bin/sh” text you added in Step 2.

Remove SD card from the PC and re-insert into the Pi.

Power up the Pi and login with your new password.